The Audio-Technica LP60X is one of the best-selling entry-level turntables on the market, its popularity is no surprise, it’s affordable, reliable, and easy to use.
However, like any tech gadget, it has to be set up correctly to work correctly.
The majority of the common issues we speak to customers about are setup issues which can be resolved quickly and easily.
Whether you’re setting it up for the first time or troubleshooting playback issues, some common problems can trip you up. This guide is here to help!
Below, we’ll tackle the most frequent issues such as the belt not being properly installed or the start/stop mechanism going haywire and I’ll show you how to fix them.
Let’s get your music playing as it should.
Common Audio-Technica LP60X Issues
1. Belt Not Fitted Correctly
Issue It Causes: LP60X has no power, platter won’t spin, buttons don’t work, LP60X platter jolts, LP60X speed issues.
The most common setup hiccup with the LP60X is the belt not being fitted correctly.
If it’s not seated properly, the platter won’t spin, leaving your vinyl collection gathering dust.
How to Fix:
- Remove the platter by gently lifting it off the spindle.
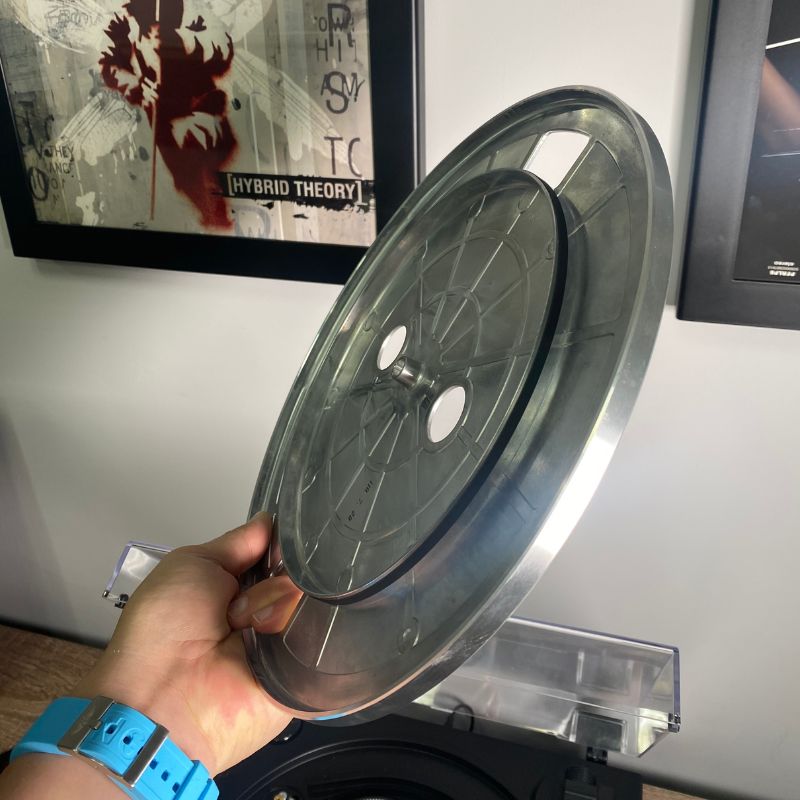
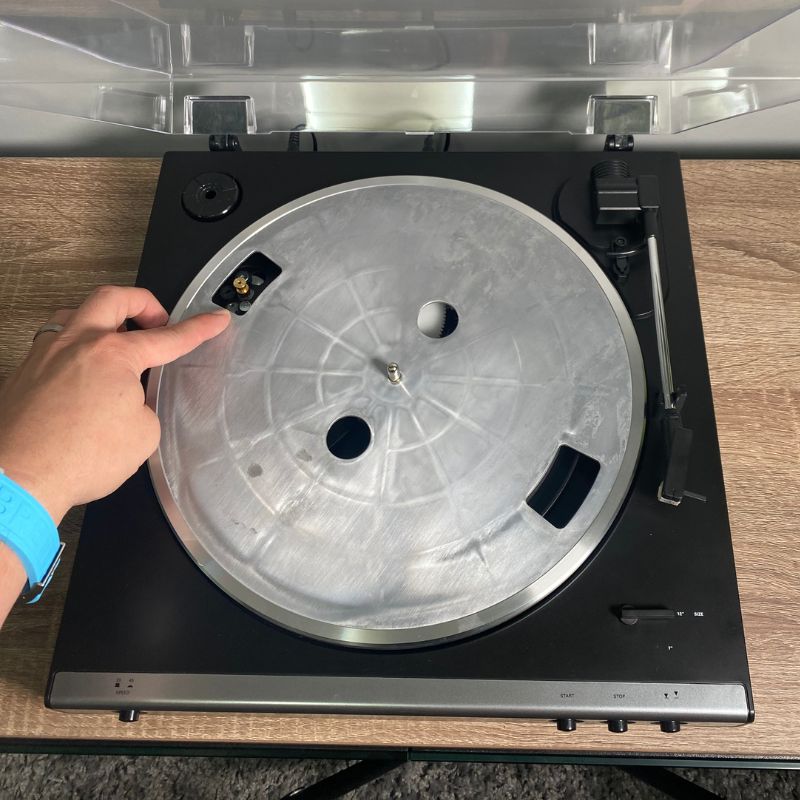
- Look underneath the platter, the belt should be installed around the inside lip of the platter itself.
- Re-fit the platter over the spindle of the turntable.
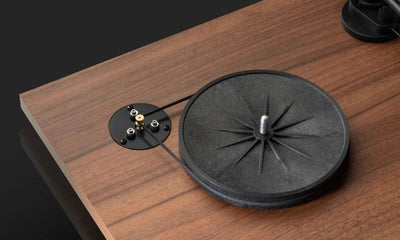
- Carefully place the belt over the GOLD motor pulley (a small metal spindle visible through the rectangular opening on the turntable's top left).
- Complete the auto start/stop mechanism setup covered in issue no. 5
Read More: How To Install The Belt On An Audio-Technica LP60X Turntable
Here's how the belt fits to the platter:
Here's how you hook the belt over the pulley, ONLY this one;
2. Line/Phono Switch Is Not Set Correctly
Issue It Causes: LP60X plays really quietly, no volume.
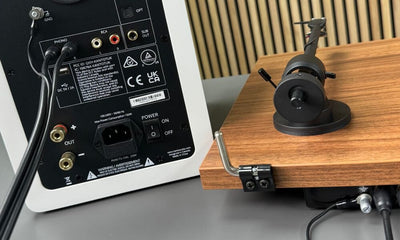
If your turntable sounds extremely quiet, this little switch on the back could be the culprit.
The LP60X comes with a built-in phono preamp, which means it works with both line-level and phono inputs without any additional equipment.
Setting it incorrectly leads to audio issues.
How to Fix:
- Check the input on your amplifier or speakers.
- If using a phono input, set the switch to "Phono."
- If using a line input or powered speakers, set it to "Line."
- Test playback and adjust accordingly.
For the majority of our customers, if you’re using it with a Bluetooth speaker or active bookshelf speakers without a phono stage, you’ll need to have the switch set to “Line”
If you’ve bought Edifier speakers from us, you’ll need to set the switch to “Line”
Here's the switch on the back of the turntable:

If you’re not sure, and it’s playing quietly, set it to “Line” as it’ll likely solve the issue.
Set the switch to line and it’s still not working? Check troubleshooting issue number 3…
3. Stylus Is Not Fitted Correctly
Issue It Causes: LP60X plays very quietly, LP60X has poor/intermittent/scratchy sound, LP60X stylus keeps falling off.
A poorly installed stylus can wreak havoc on your sound quality, or worse, it might not produce sound at all.
Another issue we commonly get is the stylus not being fitted correctly.
How to Fix:
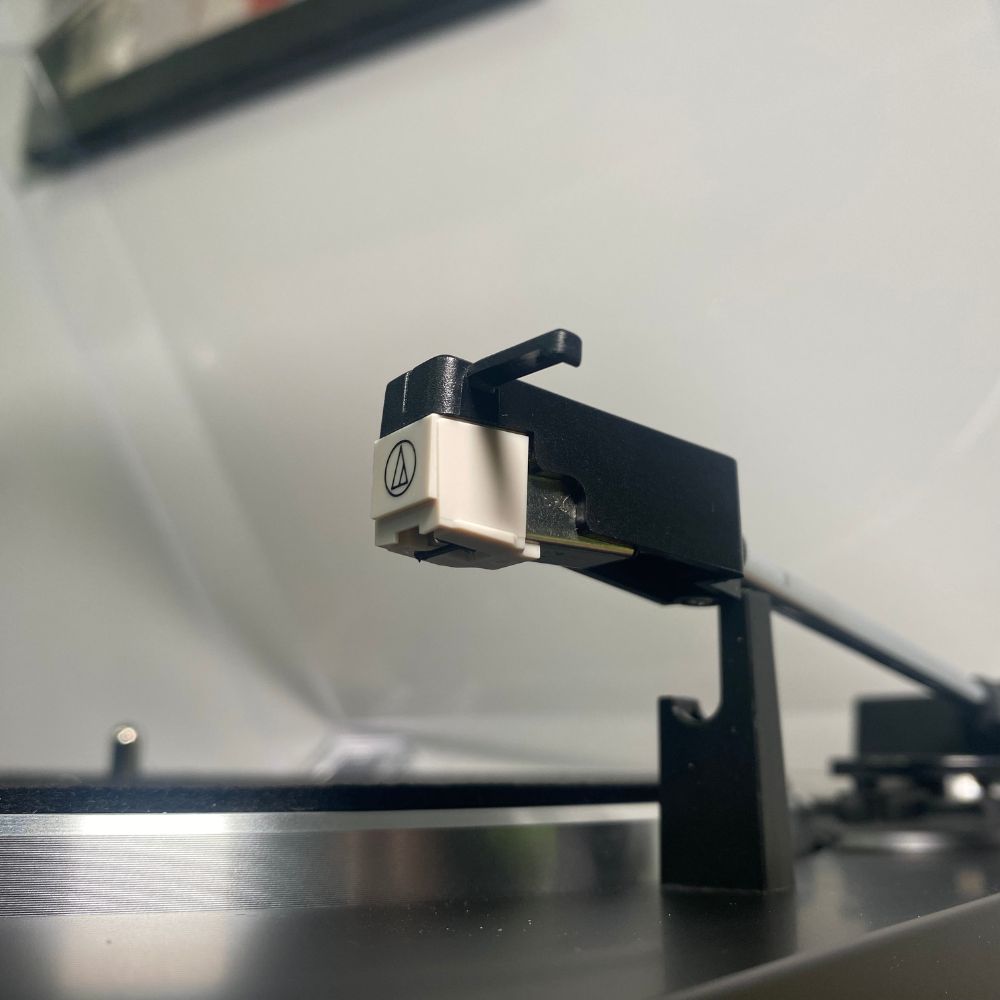
- Gently remove the stylus by pulling it straight off the cartridge (it’ll probably fall off easily if it’s not fitted correctly) make sure you only hold the sides of the stylus, never the bottom.
- You’ll note a small tab on the back edge of the stylus, this clips into the hole in the tonearm.
- Push the stylus upwards, you should hear a positive click and the stylus will sit flush with the metal of the tonearm.
Warning: The stylus is delicate, handle it carefully to avoid bending or breaking it.
This is how a correctly fitted stylus should look, if it's not flush with the black tonearm then it's not fitted correctly:
We have a fully detailed guide on How To Replace The Audio-Technica ATN3600L Stylus which covers the stylus installation in greater detail.
4. Stylus Is Damaged
Issue It Causes: LP60X has poor/intermittent/scratchy sound, LP60X stylus keeps sliding across the record and doesn’t play.
If your LP60X skips or slides across the record, or outright refuses to play, the stylus might be damaged.
This is especially common if it’s been dropped or mishandled accidentally.
It is really easy to damage the stylus if the tonearm is dropped onto a record manually, or if you move the turntable and the tonearm skates across a record.
I know it’s a bit disappointing to hear but it’s extremely unlikely to be damaged from new and is not covered under warranty for this reason so you’ll need to purchase a replacement.
How to Fix:
- Inspect the stylus tip under bright light. If it looks bent, chipped, or blunt, it’s time for a replacement. If it lays flat on a record and skates across the record then it’s likely been flattened.
- Purchase a compatible replacement stylus (Audio-Technica ATN3600LC or the upgraded ATN3600LE).
- Follow the steps above to install the new stylus.
Pro Tip: To prevent future damage, always use the protective stylus cover when not in use.
Read More: How To Replace The Audio-Technica ATN3600L Stylus
5. Start/Stop Mechanism Is Out Of Sync
If pressing “Start” doesn’t get the platter spinning or the tonearm seems out of alignment, the automatic mechanism might be mis-calibrated or you may have skipped this step completely when you set it up.
It’s really important that you allow the record to come to a stop completely when using the turntable.
It takes a few spins to slow down and stop, if you manually stop it sooner or try to take the record off before it’s stopped then you’ll end up throwing the mechanism out of sync.
How to Fix:
- With the turntable turned off, press and release the stop button.
- Hold the tonearm in the rest with one hand, use your other hand to slowly rotate the platter in a clockwise direction for 10 full rotations.
- Place a record on the platter.
- Plug the turntable into the power and press and release the “Start” button.

Final Thoughts
The Audio-Technica LP60X is a fantastic turntable, but even the best gear needs a little TLC.
Most of these issues are straightforward to resolve, even for beginners.
By following this guide, you’ll be back to enjoying your favourite records in no time.
Still having trouble? If you’ve bought from us then please get in touch and our audio experts will run through the steps with you.


